Reverse Engineering the API of a turnstile controller

Some years ago when I built the software for an online ticketing platform, we wanted to have turnstiles which can be used to improve the pass through rate of the ticket scanning process at larger events.
We found a fitting product and the seller promised us that the controller of the turnstile can easily be integrated into our local on-site application. Of course, it was not as easy as promised. We only received a DLL as an SDK for C++ for the protocol called LL268 and a demo application. So how to integrate this turnstile into our software?
Well, eventually I was able to reverse engineer the core functionality of the API so we were able to use it for our purpose.
Since the product is not used any longer, I can finally write about it.
- 1. How does the turnstile work?
- 2. Collect the Data
- 3. Analyze the Data
- 4. Recreate the server side of the API
- 5. Conclusion
1. How does the turnstile work?
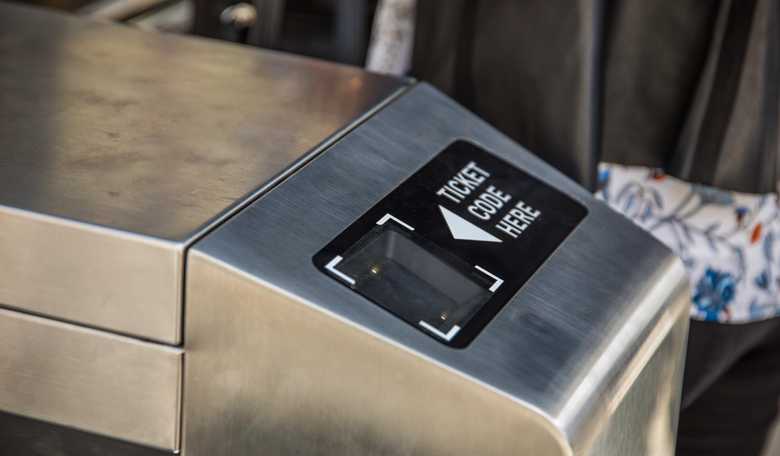
The turnstile consists of a barcode scanner and rotating arms which are locked by default. A user who want to pass the turnstile needs to present their 1D or 2D barcode on a printed ticket or smartphone to the scanner. Once scanned, the turnstile (client) sends the content of the barcode to the local application (server) which validates the code.

If the code is valid, the server sends back an opening signal that unlocks the turnstile, allowing the person to pass through. Once the person has passed, the turnstile resets and locks itself again, ready for the next user to present their barcode.
Following from that, the core functionality of the turnstile on which we will focus on are:
- Sending the content of the barcode to the server
- Sending the opening signal from the server to the turnstile
2. Collect the Data
Before trying to rebuild the server side of the API, we need to see how the actual API is working. What does the client send to the server and how does the server respond?
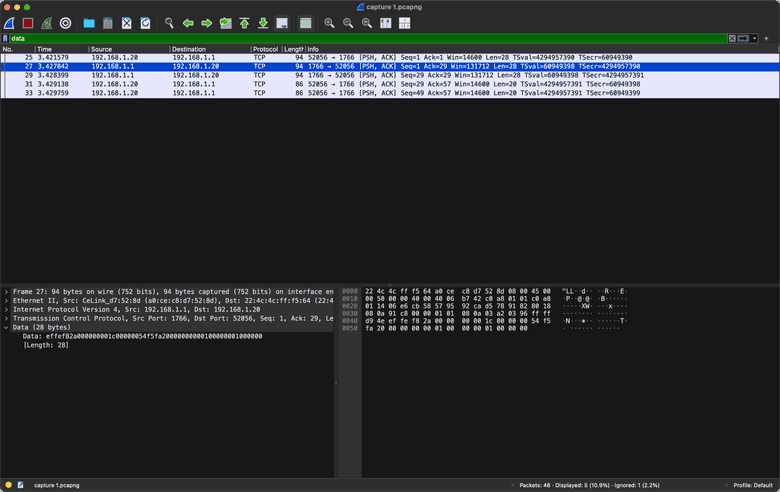
As already explained, we have a demo application which is being used to showcase the turnstile, so we can use Wireshark to profile and capture the traffic between the demo application and the turnstile to analyze the dump afterward. The demo application also lets you set up the turnstile so it knows to which server address and port it should connect to.
Since the demo application only runs on Windows and no one wants to install a random software on their laptop, we also need a Windows VM running on UTM. By this, we could also run Wireshark on the MacBook to monitor the traffic in between.
- Windows VM IP Address:
192.168.1.1 - Turnstile IP Address:
192.168.1.20 - Port:
1766
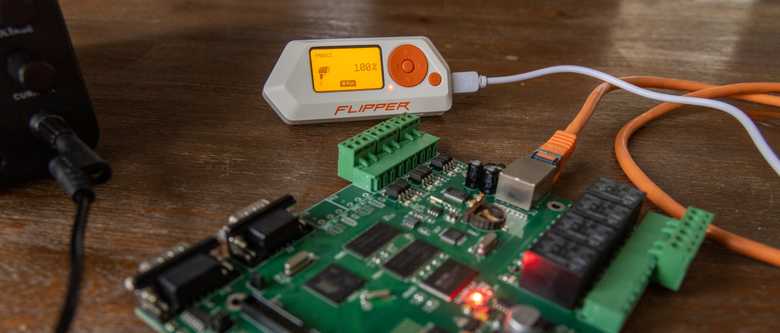
For the barcode scanner, I now use my Flipper Zero which emulates a Serial Barcode scanner, so there is no need to generate all the test barcodes.

We use the following barcodes for testing: 1, 2, 99999999 and AABBCC
After opening Wireshark, select the correct interface to collect the traffic from and hit the Start Capturing Packages button. Afterward, start the demo application and power on the turnstile controller. We already see the first packages coming in!
Now hit the button on the application to open the turnstile which results in a click sound from one of the relais on the controller after which we emulate the scanning of each barcode.

Now, all the packages have been collected which needed to be analyzed, so we hit the Stop Capturing button. By filtering the package list by only the TCP packages which have data attached, we already see the packages we are looking for.
The data looks as following:
| Action | Data |
|---|---|
| open command | ef fe f8 2a 00 00 00 00 1c 00 00 00 54 f5 fa 20 00 00 00 00 01 00 00 00 01 00 00 00 |
| Scan "1" | ef fe 71 30 00 00 01 00 13 00 00 00 84 d1 fa 20 31 0d 0a |
| Scan "2" | ef fe 71 30 00 00 01 00 13 00 00 00 84 d1 fa 20 32 0d 0a |
| Scan "99999999" | ef fe 71 30 00 00 01 00 1a 00 00 00 84 d1 fa 20 39 39 39 39 39 39 39 39 0d 0a |
| Scan "AABBCC" | ef fe 71 30 00 00 01 00 18 00 00 00 84 d1 fa 20 41 41 42 42 43 43 0d 0a |
3. Analyze the Data
For analyzing the data, we need to find patterns in it.
The first 4 bytes are always the same. It looks like this identifies the traffic between the client and the server.
The next 4 bytes are always the same for sending the barcode to the server, but are different for the open command. This looks like it identifies the type of command!
Also, the 4 bytes starting from position 29 are the same for all transmissions (fa 20). It looks like a divider. Followed by this for the barcodes
1 and 2, there is just one byte changing (31 0d 0a -> 32 0d 0a). Does this look like the content?
The answer is yes: 31 is the hex code point for the number 1 in the UTF-8 table followed by 32 for the number 2.
0d 0a are the hex code points for CR and LF (Carriage Return and Line Feed) which are being sent by most barcode scanners at the end of the code.
And for the rest in between? Well to make the turnstile controller work for now, it seems like we do not need them - at least for now.
Let's summarize the findings:
| Action | Head | Command | Unknown | Divider | Content |
|---|---|---|---|---|---|
| Open Command | ef fe |
f8 2a |
00 00 00 00 1c 00 00 00 54 f5 |
fa 20 |
00 00 00 00 01 00 00 00 01 00 00 00 |
| Scan "1" | ef fe |
71 30 |
00 00 01 00 13 00 00 00 84 d1 |
fa 20 |
20 31 0d 0a |
| Scan "2" | ef fe |
71 30 |
00 00 01 00 13 00 00 00 84 d1 |
fa 20 |
20 32 0d 0a |
| Scan "99999999" | ef fe |
71 30 |
00 00 01 00 1a 00 00 00 84 d1 |
fa 20 |
39 39 39 39 39 39 39 39 0d 0a |
| Scan "AABBCC" | ef fe |
71 30 |
00 00 01 00 18 00 00 00 84 d1 |
fa 20 |
41 41 42 42 43 43 0d 0a |
The captured packages also show an incrementing stream index for all the packages which indicates that the socket connection is not closed after sending one command, but kept alive.
4. Recreate the server side of the API
For recreating the API, I am using JavaScript for now. Back then I used Java since the GUI application was also written in Java.
Initially, we create a small Node.js project and see if the turnstile connects via a TCP socket.
import {createServer, Socket} from 'net';

console.log(`Start Server`);

createServer((socket: Socket): void => {
    console.log(`A turnstile has connected from ${socket.remoteAddress}`);
}).listen(1766, '0.0.0.0');
After running the code and turning on the turnstile, the turnstile connects. This is the first achievement!
Now let's implement the whole logic to open the turnstile when a specific barcode has been scanned:
import {createServer, Socket} from 'net';

const openCommandHex = 'effef82a000000001c00000054f5fa20000000000100000001000000';
const validCode = 'AABBCC';

console.log(`Start Server`);

createServer((socket: Socket) => {

    console.log(`A turnstile has connected from ${socket.remoteAddress}`);

    socket.on('data',(data: Buffer) => {

        // extract command
        let command = data.toString('hex').substring(4,8);

        // if command is "send barcode" command get content and validate code
        if (command === '7130') {
            // extract content
            let content: Buffer = Buffer.from(data.toString('hex').substring(32), "hex");
            // convert byte buffer to UTF8 and remove CRLF
            let scanCode = content.toString('utf8').trim();
            console.log(`Scan Barcode "${scanCode}"`);

            // test if barcode equals pre defined "valid" code
            if (scanCode === validCode) {
                // send open command
                socket.write(Buffer.from(openCommandHex, 'hex'));
            }
        }
    });
}).listen(1766, '0.0.0.0');
Following executing the code and scanning some barcodes, the turnstile behaves as expected and opens only when the specific barcode
AABBCC as defined in the code has been scanned.
The two core functionalities have been implemented successful and can be combined with the ticket code validation process. Mission accomplished.
5. Conclusion
Based on the example, only two of the core functionalities of the turnstile controller have been implemented. The controller has many more features like playing different sounds or controlling LED lights. Also, there will be exceptions that must be handled like the handling of longer barcodes, for example.
Most of the features and exceptions have been added in the following days back then and by this, the turnstiles have been used for years managing the access control of big events with tens of thousands of people until at least their proprietary controllers have been retired.
Afterward, I learned how to control GPIOs on a SoC like the Raspberry PI which made it very easy to toggle relais, and we were able to get rid of this proprietary technology.
This was definitely one of the projects that I really enjoyed.