IKEA hacking: Making the air quality sensor VINDRIKTNING smart powered by ESPHome and Home Assistant
IKEA has released the air quality sensor VINDRIKTNING which measures the PM2.5 density in the air and shows the classification by a green, yellow or red LED. For my surprise, it is a dump sensor with no ZigBee support like some other devices IKEA has released in the past months.
So let's make the sensor smart with the help of ESPHome and Home Assistant and add an additional eCO2 sensor.
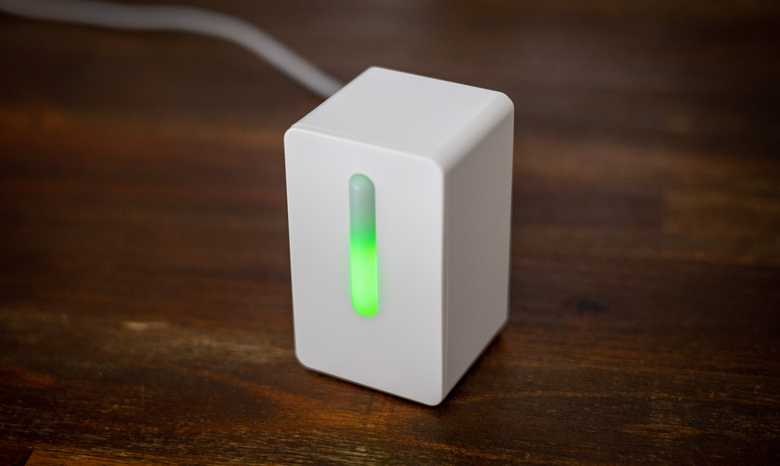
Parts List
- VINDRIKTNING air quality sensor with power adapter and cable
- D1 Mini NodeMcu with ESP8266
- CCS811 gas sensor
- Soldering iron with solder
- Cables for soldering
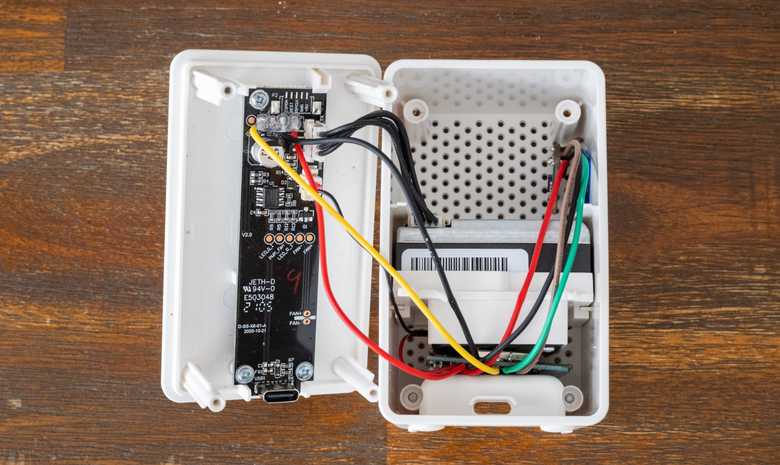
I have chosen the D1 Mini because it is small enough, and it fits perfect between the plastic of the power plug and the fan.
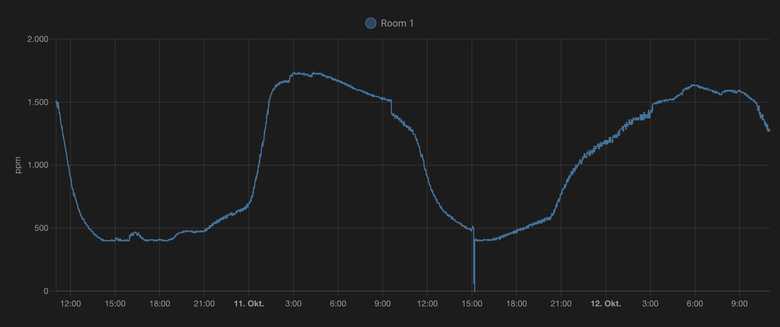
The CCS811 is a relative VOC sensor which reports eCO2. The ecO2 is the estimated concentration of carbon dioxide calculated from known TVOC (total volatile organic compounds) concentration. The sensor is not accurate because it is not an absolute CO2 sensor, but you can definitely monitor a trend.
Blueprint
If you were using another ESP8266 board, you have to check the datasheet for the serial data line (SDA) and serial clock line (SCL) hardware pins. On the D1 Mini, D2 is the SDA and D1 is the SCL pin.
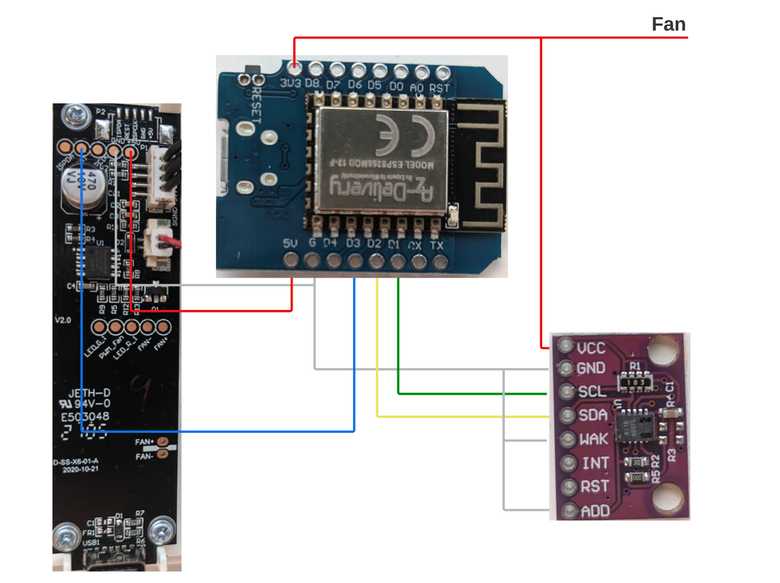
Also notice that the pins WAK and ADD on the CCS811 must be grounded. The WAK pin is responsible for waking up the device before a readout to safe power - but we do not have a logic for this setup yet - so we just ground it.
By grounding the ADD pin, we can access the device on the I²C via the address 0x5A.
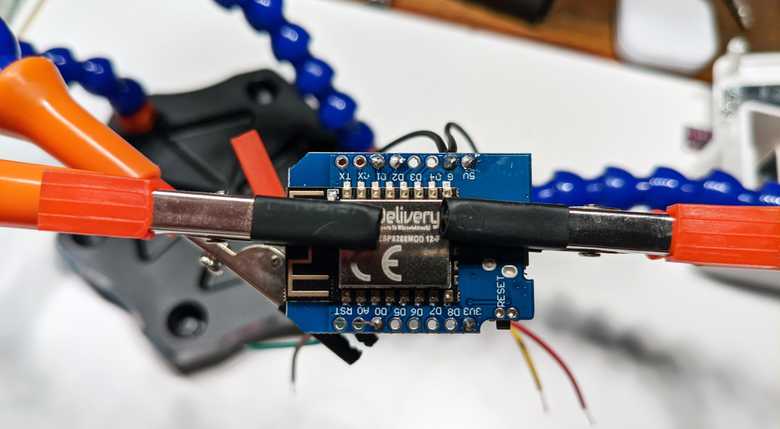
I have also connected the +5V of the fan to +3,3V to make it quieter.
ESPHome configuration
Create a new device in the ESPHome with the following configuration and flash the device.
esphome:
  name: my-room-air-quality-sensor
  platform: ESP8266
  board: d1_mini

wifi:
  ssid: "your wifi ssid"
  password: "your wifi password"

  ap:
    ssid: "Test Fallback Hotspot"
    password: "fallback password"

captive_portal:

logger:

# home assistant api password
api:
  password: "super secret password"

# over the air update password
ota:
  password: "another super secret password"

# UART config for the pm1006 sensor
uart:
  rx_pin: D3
  baud_rate: 9600

# i2c config for the ccs811 sensor
i2c:
  sda: D2
  scl: D1

# sensor configuration
sensor:
  - platform: pm1006
    pm_2_5:
      name: "My room PM2.5"
  - platform: ccs811
    eco2:
      name: ""My room eCO2"
    tvoc:
      name: ""My room TVOC"
    address: 0x5A
    update_interval: 60s
Be aware that the pm1006 of the VINDRIKTNING is added via an external repository. This will be added in the next release of ESPHome so this config can be removed and may even result in an error if not removed.
The CCS811 sensor does have a so called "burn-in" period of 48 hours. After this period, the sensor will start to report stable values. Make sure that the device is put in an as clean as possible environment.
After 48 hours, you must add the baseline value to your ESPHome configuration for calibration purposes to prevent offset values after a power loss because the sensor will re-calibrate itself each time it is powered on.
  - platform: ccs811
    eco2:
      name: ""My room eCO2"
    tvoc:
      name: ""My room TVOC"
    address: 0x5A
    update_interval: 60s
    baseline: 0x****
You can find the baseline value from the calibration process in the log:

Home Assistant integration
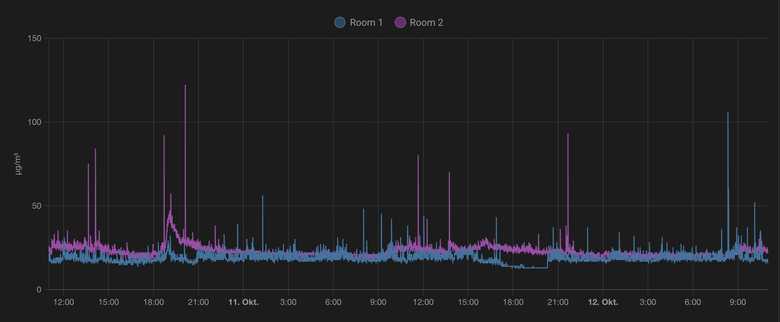
When everything is working correct, the device should have already been found automatically by your Home Assistant installation. You can now add the entities into your Lovelace dashboard.
PM 2.5
CO2
Happy monitoring ✌️