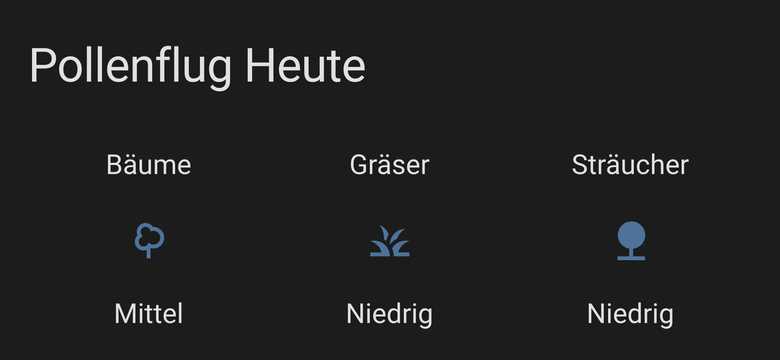
How to integrate an external API into Home Assistant - An example with the Ambee Pollen API

Home Assistant is an open source home automation hub with a huge ecosystem powered by a worldwide community. With its RESTful integration, you can easily add an external API as a sensor on which you can build an automation or just show the given data on your dashboard.
In this tutorial, I will show you how to integrate the pollen data of Ambee which provides powerful APIs for real-time air quality, weather, pollen and fire data.

Preconditions
Before you begin, you need an API key from getambee.com/. The free account has 100 API calls a day included.
You also need the latitude and longitude, the coordinates at the geographic coordinate system, of the location you want to track. You can grab them at latlong.net.
Fetch the data
We want to provide the data for each pollen type: tree, grass and weed. The Ambee Pollen API exposes all three in one request.
At first, we need to consume the data from the API and expose it as rest platform. You need to create a new sensor and include it into the configuration. Since I like a modular approach, I put each sensor in an extra file in the folder called sensor. You can then include all files in this directory as a sensor.
# file: configuration.yaml
...
sensor: !include_dir_merge_list sensor/
...
Next you have to create a file called ambee.yaml in the sensor directory.
- platform: rest
  resource: https://api.ambeedata.com/latest/pollen/by-lat-lng?lat=LAT&lng=LONG
  name: "Ambee Pollen"
  scan_interval: 3600
  headers:
  content-type: "application/json"
  x-api-key: "API-KEY"
  json_attributes_path: "$.data.['Risk']"
  json_attributes:
    - tree_pollen
    - grass_pollen
    - weed_pollen
resource
The API endpoint of the API you want to use. The coordinates of Ambee were submitted as GET parameters. Replace the LAT and LONG values with your own coordinates.
name
Name of the sensor for the identification of the sensor in Home Assistant.
scan_interval
The polling interval of the endpoint in seconds. In this example, the data will be refreshed every hour.
headers
The request headers for the request. Ambee requires an authorization by header so we need to set the headers according to the documentation. Replace the API-KEY with your own API key.
json_attributes_path
A JSONPath that references the location of the json_attributes in the JSON content returned by the API.
The Ambee Pollen API returns following JSON
{
  "message":"Success",
  "lat":40.69008,
  "lng":-74.045264,
  "data":[
    {
      "Count":{
      "grass_pollen":1,
      "tree_pollen":372,
      "weed_pollen":2
      },
      "Risk":{
      "grass_pollen":"Low",
      "tree_pollen":"High",
      "weed_pollen":"Low"
      },
    "updatedAt":"2021-04-16T17:09:35.000Z"
    }
  ]
}
Since I am interested in the Risk and not the count, I have set the JSONPath to the Risk dictionary.
You can play around with the response above over here. Home Assistant uses jsonpath 0.82.
json_attributes
A list of keys to extract values from a JSON dictionary result and then set as sensor attributes.
You can find the complete documentation over here.
The sensors
You now need to create the sensor templates. Append the following data to ambee.yaml for the grass sensor
- platform: template
  sensors:
    ambee_pollen_tree:
      icon_template: "mdi:tree-outline"
      friendly_name: "tree"
      value_template: >-
        {% set state = state_attr('sensor.ambee_pollen', 'tree_pollen') %}
        {% if state == "Low" %}Niedrig
        {% elif state == "Moderate"%}Mittel
        {% elif state == "High"%}Hoch
        {% elif state == "Very High"%}Sehr hoch
        {% else %}Unbekannt{% endif %}
You can set the icon template and a friendly name for the sensor. Home Assistant has the Material Design Icons integrated - just prefix the icon name with `mdi:.
In the value template, I am using state_attr to fetch the value from the rest platform we have created by the name and the json_attribute. Also, I am using if else conditions to print out the german name.
You can find the complete documentation for the templating over here.
When you have added the template for the other sensors, grass and weed, your ambee.yaml should finally look like this
### Ambee Pollen

# Must be added in sensor.yml
# replace LAT, LONG and API-KEY with your values

- platform: rest
  scan_interval: 3600
  resource: https://api.ambeedata.com/latest/pollen/by-lat-lng?lat=LAT&lng=LONG
  name: "Ambee Pollen"
  headers:
    content-type: "application/json"
    x-api-key: "API-KEY"
  json_attributes_path: "$.data.['Risk']"
  json_attributes:
    - tree_pollen
    - grass_pollen
    - weed_pollen

- platform: template
  sensors:
    ambee_pollen_tree:
      icon_template: "mdi:tree-outline"
      friendly_name: "tree"
      value_template: >-
        {% set state = state_attr('sensor.ambee_pollen', 'tree_pollen') %}
        {% if state == "Low" %}Niedrig
        {% elif state == "Moderate"%}Mittel
        {% elif state == "High"%}Hoch
        {% elif state == "Very High"%}Sehr hoch
        {% else %}Unbekannt{% endif %}

- platform: template
  sensors:
    ambee_pollen_weed:
      icon_template: "mdi:nature"
      friendly_name: "weed"
      value_template: >-
        {% set state = state_attr('sensor.ambee_pollen', 'weed_pollen') %}
        {% if state == "Low" %}Niedrig
        {% elif state == "Moderate"%}Mittel
        {% elif state == "High"%}Hoch
        {% elif state == "Very High"%}Sehr hoch
        {% else %}Unbekannt{% endif %}

- platform: template
  sensors:
    ambee_pollen_grass:
      icon_template: "mdi:grass"
      friendly_name: "grass"
      value_template: >-
        {% set state = state_attr('sensor.ambee_pollen', 'grass_pollen') %}
        {% if state == "Low" %}Niedrig
        {% elif state == "Moderate"%}Mittel
        {% elif state == "High"%}Hoch
        {% elif state == "Very High"%}Sehr hoch
        {% else %}Unbekannt{% endif %}
Don't forget to check your configuration in the server control panel before you restart Home Assistant!
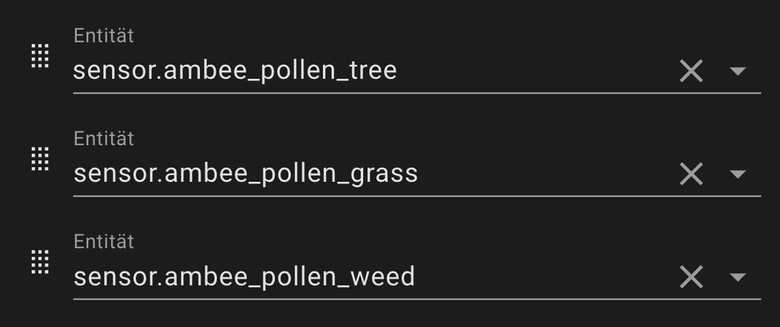
After the restart, your sensors will be available as following

You can find the source code here.